Today with news of a useful component that can shows you the way to continue your own components in Angular2.
Here you can see the demo (click the Project link button).
We have two components: the tree component and the node component (the tree component is an array of node components).
Take a look to the tree.component (html and css files):


And here is the ts file:

You can see that we don't need a css file and the html iterate an array of node and calls the app-node-tree with the root properties.
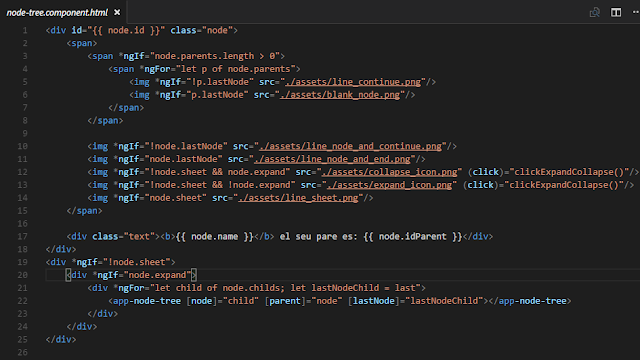
Now take a loot to node.component (html and css files):


Here we can see the styles of my node, setting the div and img style's and the html file. There is a div with the images that we have to load on the node and later we iterate the array of children of the node.
We use a recursive component, because we call the aap-node-tree in an app-node-tree.
Take a look to ts file:

In this Typescript file we load the node with the loadNode method. The ancestors and the property lastNode indicates whether the node is the last sibling of the same parent.
There is a method that change the state between expand and collapse of the image in the node.
At last, we will see the tree.json file with the structure of our tree, that we can change with the structure we want:

On my example, we have to repeat this structure three times and we will get our tree.
I hope you find this article interesting!
Here you can see the example.
This example is done with Angular-cli.
Here you can find the repository of the component done by @davidnezan.
Try it and have fun!